Some basics first
There are several options for connecting a camera to a microscope. The camera system can either be connected via a dedicated photo tube on a trinocular head, or can be connected to one of the microscope’s eyepieces. Depending on the set-up, there can be either intermediate optics between the camera and the microscope’s objective, or not.
- The image produced by the microscope objective can be directly picked up by the sensor of a camera, without an eyepiece or other intermediate optics. Here objective of a microscope produces a real image directly on the camera’s sensor. The objective produces a relatively large image, compared to the small sensor of many cameras. Unless the sensor is large, there may be quite much empty magnification and the brightness of the image is low.
- The image produced by the microscope objective can also be passed through a reduction lens before reaching the camera sensor. This way the image produced by the microscope objective is reduced in size to better match the small sensor size of the digital camera. The reduction lens produces a real image on the camera sensor. Without the reduction lens the image would be magnified too much. The reduction lens also results in a brighter image. This is an improvement to the first point from above. Eyepiece cameras for microscopes use this system. The reduction lens is not a compensating photo eyepiece and therefore does not correct lens errors produced by the objectives.
- The image produced by the microscope objective is first passed through a regular eyepiece. A virtual image is produced this way, which can not be used to directly make a picture. A camera (with its own objective) then picks up the virtual image and projects it on the sensor. The camera works like the eye, which converts a virtual image to a real image. This system is used in afocal photography, in which a regular compact camera (with its own objective and all) is attached in front of the eyepiece.
- The image produced by the microscope objective is passed through a photo projection ocular (photo eyepiece), which then projects a real image on the sensor of an SLR camera. There are no camera objectives involved. The projection eyepiece corrects optical errors which are produced by the microscope objective. These photo projection eyepieces are compensating optical elements. This means that they are designed to correct various lens errors that the objectives produce, including field curvature and chromatic aberration. These projection oculars are therefore manufacturer dependent and must correspond to the objectives of the manufacturer. Besides image quality, another advantage is, that parfocality is maintained between the camera and the eyepieces (i.e. both images are in focus at the same, and there is no focus deviation).
Let’s now have a look at a few real life applications:
Connecting a webcam (home-made solution)
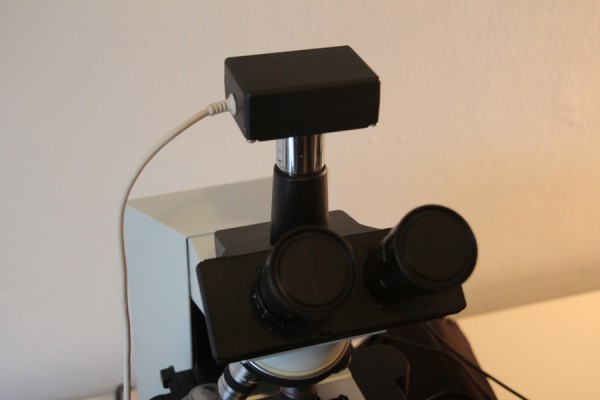
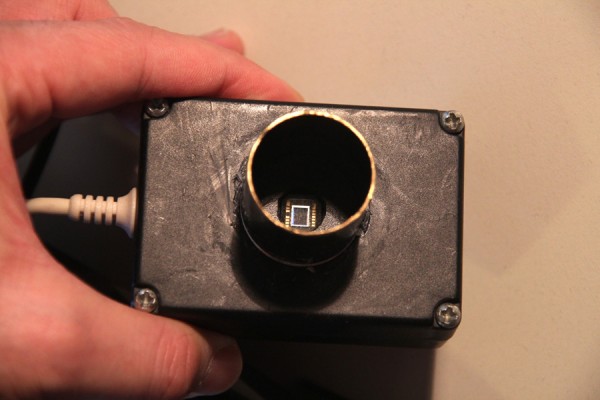
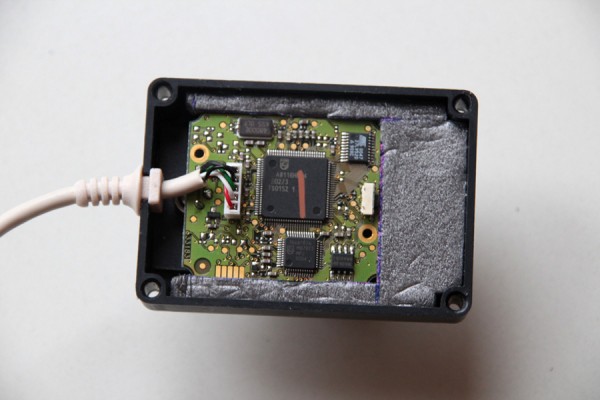
This was one of my earlier attempts of connecting a camera to a microscope. I completely dismounted a webcam and removed all of the optics. Leaving the webcam optics in place (used in afocal photography) would result in a too small image because most webcams have wide-angle optics. I then placed the electronics with the attached sensor into a separate plastic box and attached a short metal tube to the box for easy placement on the trinocular head. There were no intermediate optics involved and the image was directly projected from the microscope’s objective. Make sure that the blue filter is still in pace in front of the sensor (they are quite red sensitive), otherwise you have to use a blue “daylight” filter (for photography) on top of the halogen lamp of the microscope.
Advantages:- This was a low-cost solution and worked reasonably well. The plastic case was not expensive at all and the short metal tube I obtained from an old discarded telescope. I was lucky that the diameter was just right.
- The webcam produces a live image on the computer screen, which can be easily focused.
- The webcam was released through the computer and therefore there was no camera shake, resulting a steadier image.
Disadvantages:
- The resolution of the camera was quite low (640×480 pixels), but this can be resolved by using a different webcam.
- The far bigger disadvantage was, that the objective generated a relatively large image and the sensor of the camera was quite small. For this reason there was much empty magnification. Intermediate optics (reduction lenses) would have reduced the size of the image and would therefore also have made a brighter and sharper picture. These optics were not available to me, however.
- Some lack of parfocality can also be a problem. The focus of the camera and of the eyepieces are not the same. The objectives produced an image 10mm down in the phototube. This place was of course not accessible by the webcam. If the deviation is too large then this can become a problem for the objective to slide distance during focusing.
- Webcams often have a blue filter covering the sensor to reduce the effect of infra red light, which gives the whole image a reddish hue. If you remove this filter with the optics, then you need to add a blue filter over the microscope illumination or into the condenser
Connecting an analog video camera (home-made solution)
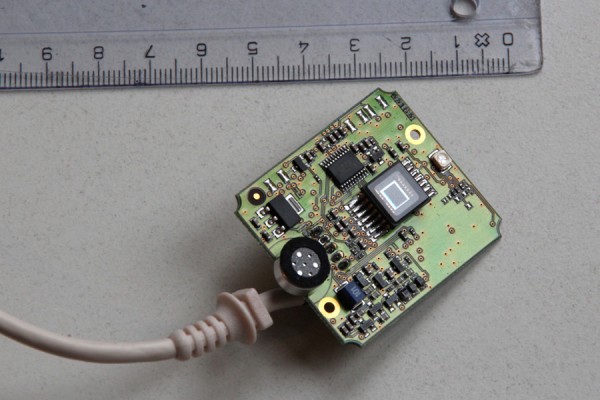
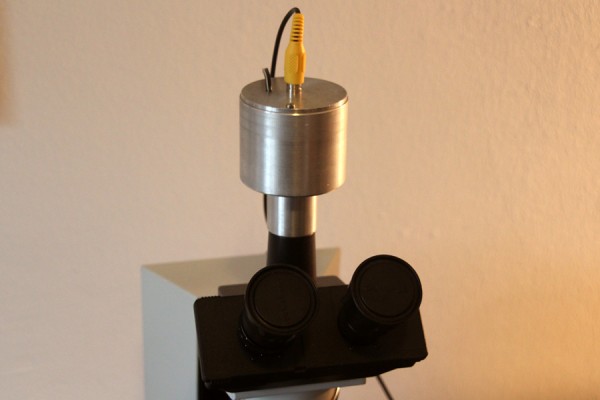
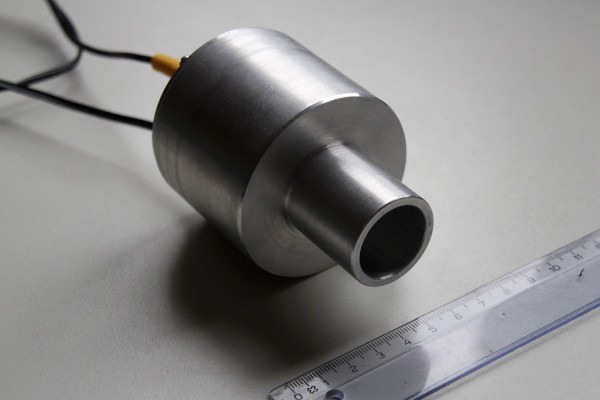
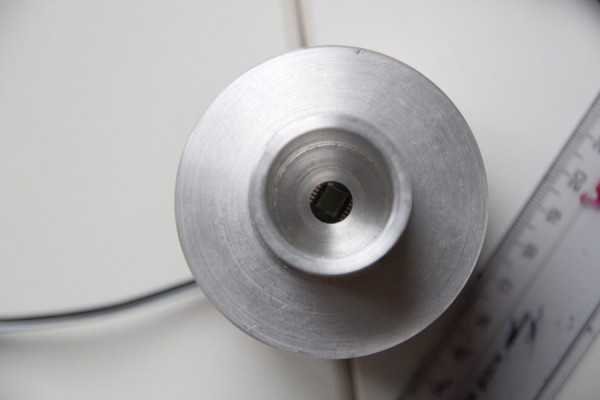
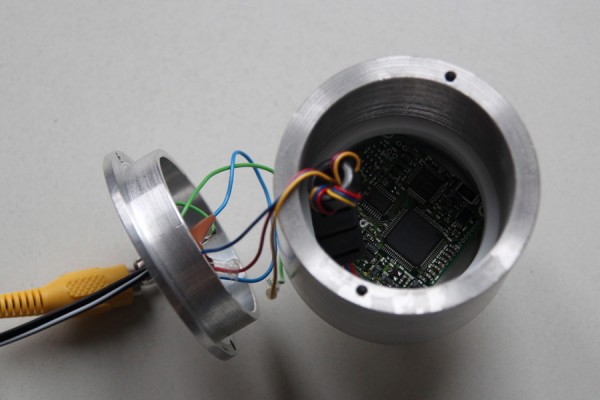
The principle here was the same as in the webcam solution. I ordered a color surveillance camera module, without case, only the electronics, and mounted this into an aluminum case, which a friend of mine made for me using the appropriate tools. I connected the camera both to a VCR recorder and a TV. Advantages and disadvantages were quite similar to the webcam solution.
Advantages- Fast video display on a TV is possible. This makes it suitable for use in classrooms that have TV screens. There is no need to convey the signal over a computer.
- The speed is in real time and faster than when using slower webcams.
Disadvantages
- Unlike webcams, a separate power supply is necessary.
- Analog video is now somewhat outdated and the resolution is lower than with modern webcams.
- The surveillance camera must be compatible with the TV system (NTSC, PAL or SECAM).
- Capturing still images on a computer (or simply viewing the images on a computer) requires an analog video input, which not every computer has.
Connecting an SLR
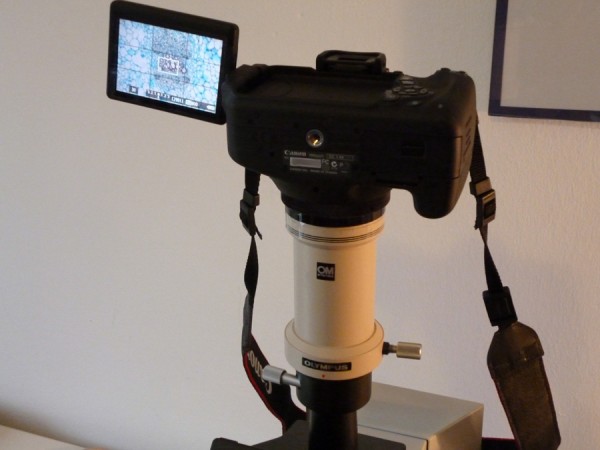
“Big name” microscope manufactuerers all have dedicated imaging solutions for their microscopy systems. This one was the most expensive solution, but also the one giving the best results. The image from the microscope’s objective is further processed by a special photo-projection ocular, which then projects it directly on the sensor of an SLR (single-lens-reflex) camera. The projection eyepiece corrects all remaining lens errors from the objectives. I have worked a lot with this system, and the resolution of the pictures is very high. I now have an 18 megapixel SLR camera and this resolution is much higher than the resolution produced by the microscope and specimen.
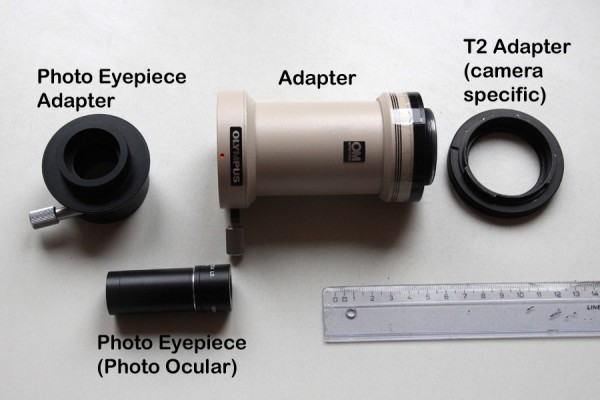
The photo eyepiece adapter is mounted on the phototube of the trinocular head and holds the photo ocular.
- The best image quality is produced. The projection ocular corrects chromatic aberration and also generates a flat field of view (so that the sides of the image are not out of focus).
- SLRs have a high dynamic range (both bright and dark areas can be captured at the same time, without much information loss).
- Some SLRs allow for the capturing of RAW images. These are able to capture an even higher color depth for a high dynamic range.
- SLRs have a high resolution, often much higher than dedicated microscope cameras (for the same cost).
- The sensor of SLRs is quite large, therefore the signal to noise ratio is high. This makes it suitable for low-light photography or high ISO photography and very short exposure times.
- It is possible to couple the SLR with a flash system for the microscope, for microflashing. I never tried this, though.
- The SLR can also be controlled from the computer for automatic photography (called tethered shooing).
- Some modern digital SLRs also allow for video recording. This is a major advantage, if needed.
Disadvantages:
- Generally a high cost of both SLR camera and associated adaptor tubes, projection oculars, etc. The projection eyepiece and phototube are manufacturer specific and can be relatively expensive, especially when the components are not manufactured anymore. I read somewhere, that there are also non-manufacturer specific adapter tubes available for SLR cameras, but one has to do some research for this. For best results, the projection ocular must match the objectives and sensor size of the camera.
- A dedicated trinocular head with phototube is necessary. It is not possible to connect the SLR and phototube in front of an eyepiece tube (which extends 45 degrees horizontally), due to its weight.
- Camera shake during the release can be much higher than with other cameras and can blur the image a bit, but there are solutions for this (long exposure time, using mirror lock up).
- Live-view on the computer screen is not always possible, this depends on the SLR.
- The photo projection ocular should be from the same manufacturer as the microscope objectives, otherwise lens errors are not properly corrected.
- My system uses a photo projection ocular which was designed for analog 36mm film cameras. My current digital camera has a smaller sensor size and therefore there is extra magnification and the field of view is not as wide. Stitching images together with panorama software can be necessary. The field of view is much wider than in the webcam and analog video solution (from above), however. Different projection oculars for smaller sensors do exist, they are not manufactured anymore, and are thus relatively expensive.
- SLRs can not be used for focal photography, the lens diameter is too large.
- Not every microscope manufacturer may offer SLR adapter tubes and corresponding compensating photo eyepieces and it may be necessary to use manufacturer independent products. These may not deliver the highest image quality, however.
Connecting compact camera (afocal photography)
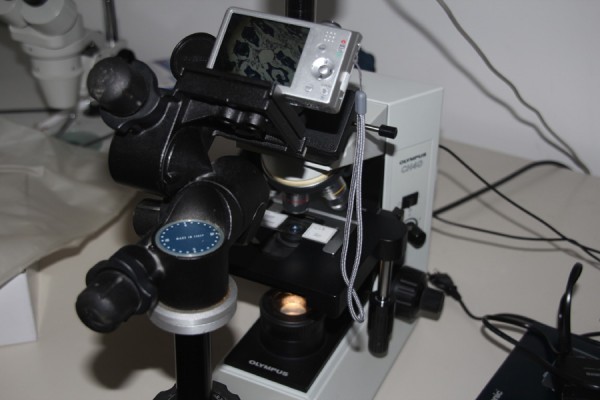
Fortunately it is possible to make good quality pictures by using regular digital compact cameras as well. This solution is more cost effective. The front lens of the compact camera must be sufficiency small, which is usually the case. The camera is mounted on a tripod and the picture is taken through the eyepiece of the microscope. It is necessary to zoom in and it is also necessary to adjust the camera-eyepiece distance properly. There are some adapters available, which allow one to clamp a compact camera to the base of the eyepiece, without any modifications to the camera. These clamps use the tripod connector of the camera.
Advantages- No trinocular head needed and one can use a camera that one already has.
- It is also possible to take pictures freehand, without tripod, if there is sufficient light for short exposure times (but this is a bit difficult sometimes).
- Due to the high resolution of compact cameras, much image information can be captured.
- It is also possible to zoom in and out.
- Many modern compact cameras also allow for the recording of (HD) video clips!
Disadvantages
- There is the possibility of vignetting if the system is not properly set up. For proper photography one also needs to use a tripod, which takes space.
- The theoretically best image quality can not be achieved (compared to connecting an SLR with projection eyepiece), but often the quality loss is irrelevant. The reason for this is because there are simply more lens elements in the light path (camera objective) and because the regular eyepieces are not designed for photography.
- The suitability of the compact camera for microscopy has to be tested first, not all compact cameras may work equally well (depends on diameter of camera objective). If the camera objective is larger than the exit pupil of the eyepiece, then there is the possibility of vignetting (solution: zoom in more).
- Field curvature may possibly be a problem. In this case the side of the image is out of focus, while the center is in focus. This effect can be reduced by zooming in.
- The set up with tripod is not very convenient. It is possible to make an adapter tube which is connected directly to the camera. This tube then can be inserted into the microscope like an eyepeice. It is possible to use compact cameras that have a filter thread and connect the adapter tube to this thread.
Using a mobile phone camera
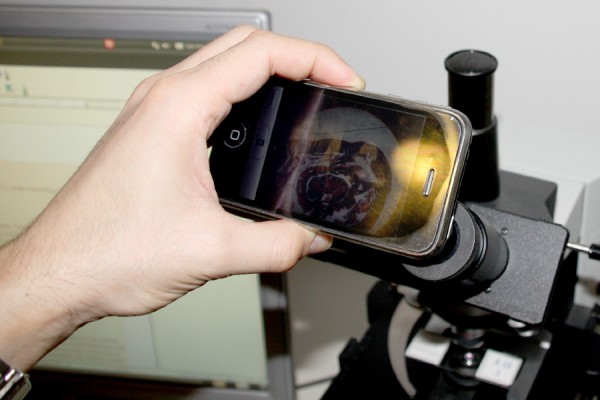
Yes, this too works! The objective lens of the mobile phone is smaller than the image produced by the eyepiece, so this works. The camera focuses to infinity.
Advantages- Fast, simple, no extra cost and no microscope adaptations are necessary.
- There is a microscopy iPhone app which calculates magnification, it is worth checking out.
- The pictures can be directly sent from the phone, if this is needed.
Disadvantages:
- Very steady hand needed to hold the camera at the correct distance from the eyepiece. A wrong camera to eyepiece distance will result in vignetting.
- The camera is usually wide-angle and covers the complete field of view. The image is in a circle. For this reason pixels are wasted.
- The solution is somewhat improvised (having to hold the mobile phone by hand) and I have not used it on a regular basis.
Connecting a dedicated microscope camera
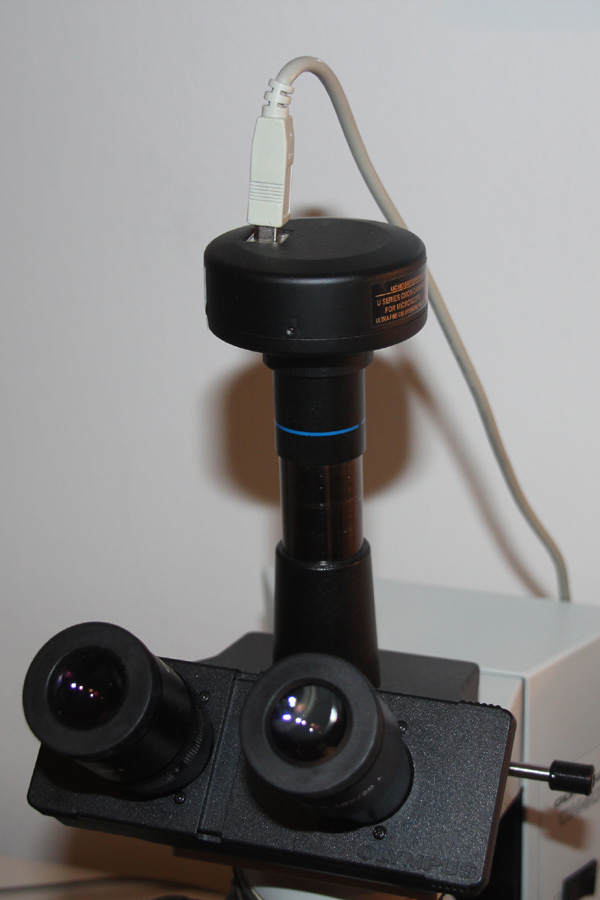
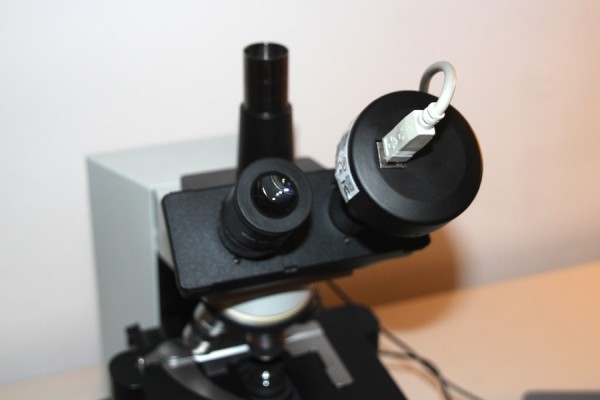
This is my favorite solution, because of its high convenience. It is possible to do microscopic observations without looking through the eyepiece, only the computer monitor. This can be more relaxing at times. These cameras are connected directly to the computer and are controlled entirely over the computer. Full manual control is possible with the camera that I have. This is absolutely essential (especially when one wants to make panoramic images). There are reduction lenses in front of the camera, so the brightness of the image and field of view are increased (compared the the DIY webcam solution from before). And for those of you who do not have a trinocular head: these cameras can be mounted instead of an eyepiece!
Advantages- Most convenient, relatively small (compared to connecting an SLR).
- The image sensor (in combination with the reduction lens) also covers a wide field of view but does not make the image appear in a circle (like when using mobile phone cameras).
- The camera can stay on the microscope and I do not have to detach it like I had to for my SLR.
- There is no shutter release shake and all of the pictures are stored on the computer’s hard disk. It is therefore possible to take many images for time-lapse photography, without having to worry about the memory card becoming full.
- No trinocular head needed! These cameras are light enough to be used instead of an eyepiece.
- These cameras often have a C-mount or CS-mount to which the reduction lens is connected. It is therefore possible to exchange the reduction lens to obtain a different magnification. Unfortunately, these reduction lenses are difficult to obtain alone, without camera.
Disadvantages
- Compared to the camera resolution, these systems are quite expensive (but not unaffordable). I paid over $260 (EUR 200) for a 3.1 megapixel microscope camera with reduction lens. For my uses, a higher resolution is not needed, however.
- It is also necessary to have a computer around and running for taking pictures, as the camera is not able to store images.
- Another disadvantage is that the USB cable connection is too slow to allow for high-quality video recording. Movements are not recorded smoothly. Using a lower resolution may resolve the problem.
- The reduction lens can not be compared to a compensating photo projection eyepiece, which corrects lens errors (and is manufacturer specific).
Other possibilities, which I did not try
- Using a camera system which was specially designed for the microscope. Bigger microscope companies offer these solutions. The camera has a mount which fits only to the microscopes of a particular manufacturer. Often the optics of the camera are also match the optics of the remaining microscope (compensating lens errors etc.). Sometimes these cameras also have other features that are not commonly found on digital cameras, such as stand-alone operation (no computer connection needed), LAN connectivity, or even a separate camera control panel. I would guess that these cameras are interesting for research institutions, who want to have a solution, which works out of the box.
- Removing the objective of a compact camera and attaching a custom-made adapter (with or without reduction lens) to the body of the camera. These adapters may need to be designed specifically for the camera. You may be interested in this link: Making Digital Camera Microscope Adapters
- Attaching a custom adapter to a compact camera for easy afocal photography. The camera’s objective stays on the camera. The adapter goes over the camera’s objective and can be connected to the eyepiece without the use of a tripod.
- Using a clamp to hold the camera for afocal photography. I have found one German shop specializing in amateur astronomy (!!) selling these holders for microscopes and telescopes. The holder is clamped to the tube of the microscope and also holds a compact camera. Check the following links to see what I mean (I am not affiliated with this shop): Link 1 | Link 2 | Link 3 | Amazon also has them
Do you have any further suggestions on how to connect a camera? USe the comments section below to share your thoughts!





January 6th, 2012 at 14:20
Excellent account.
For connecting a SLR you do not need expensive adapters. Just mount the camera body on a stand that holds the camera above the trinocular tube.
No need to, and probably best not to, connect the SLR to the microscope. You do need the special photo eyepiece
(a NFK for the Olympus, Nikon have a similar system).
The camera sensor has to be about 125 mm from the NFK, any make of SLR will work. Cover the gap between the camera and the photo eyepiece with a tube lined with black light-absorbing material. Very nice to have a camera that has Live View as then you can use a TV to see what the microscope sees.
January 7th, 2012 at 10:30
Tony,
Yes, it may be possible to connect the camera body with the microscope over a bellows. Having the SLR attached to a separate stand (and not to the microscope itself) also reduces vibration.
On a different note: Most large microscope manufacturers changed their system and now produce infinity corrected microscopes. It can be difficult to obtain photo eyepieces that are made for the older finite system.
Oliver.
January 7th, 2012 at 13:09
J have a Nikon D90 with attached bellows that I position over the NFK photo eyepiece of an Olympus BH2, not touching. My images can seen in the magazine,
plenty of Olympus NFK photo eyepieces on ebay; but don’t buy anything higher than 2.5x.
If you have Nikon CF objectives you do not need a photo eyepiece. These objectives are ‘Chromatic Aberration free’ and all corrections are in the objective. Older objectives from other manufacturers do the final corrections in the photo eyepiece – thus you should match objectives and eyepieces from the same maker.
January 26th, 2012 at 11:04
Oliver,
I have a dedicated microscope camera (3.0 MP) recently purchased in a package with a new stereo microscope. Regarding your comment:
“Another disadvantage is that the USB cable connection is too slow to allow for high-quality video recording. Movements are not recorded smoothly. Using a lower resolution may resolve the problem.”
How can one use a lower resolution? Is that something that can be selected inside the software, or do you mean one must use a different camera with, say, 1.6 MP? Would a 5.0 MP camera be even more of a problem for video recording?
Thanks ~ Avidor
January 28th, 2012 at 22:12
This is more of a suggestion than a solution and i was wondering if anybody has done this. A few of the new compact digital cameras have removabale objectives and one of them, the Sony NEX-5N (and probaly all of the NEX series) sem to be able to operate without specific objective lenses connected to the camera. There seem to be adapters avalable at a few £ whiuch allow the conection of old manual objectives.
The benefit of this solution would be that the camera has a large (APS-C) size sensor with 16MP and streams video at 1080p HD. This would give a good image quality for live work and focussing and an even beter image quality for still shots.
Any comments ??
I am happy to exchange private e-mails for further discussions.
January 29th, 2012 at 21:12
That is a standard technique with digital SLRs. One can use any camera lens with the correct lens-to-camera coupler. But also, perhaps more useful, is that one can use Nikon CF microscope objectives rather than a camera lens.
Such objectives have to be CF (chromatic aberration free). My camera has live View and a HDMI connector, I can see images (before and after capture) on a HDMI TV – makes for great focusing and looking. I use 2x-60x objectives on my system, although beyond 10x requires experience and some luck to get a decent image.
February 20th, 2012 at 23:19
If you would like to save the time and aggravation of building a coupler yourself, we manufacture a line of camera to microscope couplers for digital SLR cameras. Our couplers are very well designed with high quality optics, and they provide a wide field of view. They are available for a wide range of current and legacy microscope models.
April 7th, 2012 at 02:15
I have a dedicated 9.0 megapixel camera that I am trying to use with my trinocular microscope. Unfortunately, when the object is in focus to my eyes, the camera is not. The trinoc tube is adjustable up and down, but not enough (down) to compensate. I would like to shorten this tube, but fear damaging it due to my “all thumbs” technical abilities.
Any suggestions? I only need to shorten the tube about 1/2 cm.
April 7th, 2012 at 08:01
This difference in focus is nothing unusual. I would not start cutting the tube – the focus may be different for different objectives (if you get it sharp with one objective, it still may be out of focus with the other ones). Unless the difference in focus is big, I would probably leave it. Instead of moving the whole camera, try to move the photo eyepiece (if you use one) up or down to focus.
Oliver
April 14th, 2012 at 09:44
There is an easier way to connect a digital camera to the microscope without having to use a tripod. I used my old rusty universal 2-way clamp to hold my cannon camera in place. One other end is than mounted close to the eye piece of the microscope. This works wells as long as your microscope has a sturdy base otherwise it will tip over. With a 12MP camera the images are pretty good. Be careful though not to accidently scratch the lens of your camera which nearly happen to me.
May 16th, 2012 at 01:42
Very good account ! What is the brand/type of the dedicated 3.1 MP camera if i may ask ? Could not find it on the net.
May 16th, 2012 at 20:44
The camera is a UCMOS03100KPA
camera from the company ToupTek.
The web address is: http://www.touptek.com/product/showproduct.php?lang=en&id=23
Software is included, but the driver also works with other webcam programs. I use the free program WebcamViewer V1.0 to take the images. First you adjust all of the camera settings (exposure time, white balance etc.) in the supplied program ToupView. The settings are then remembered when the program is closed, and then it is possible to use other programs as well to take the pictures (but of course it is possible to use the supplied program as well, but I like the simplicity of WebcamViewer, which allows me to take quick pictures by simply clicking on the displayed live image).
My camera is round, the one shown on the company website is square, but the camera designation is the same, so I guess that it contains the same electronics. Mine also came with associated optics, and I bought the camera from a local telescope shop, which imported the camera (there are adapters included for telescope as well).
Oliver.
May 24th, 2012 at 14:59
After purchasing a cnscope 2M pix camera, and scope photo software I notice that the image field of view is considerably reduced, and appears at higher magnification than the image seen directly via the eyepieces i.e. there is a need for a reduction lens. Prior to purchase I requested information about the the lens, but to no avail no response was obtained. I bought the camera anyway an sure enough there is no reduction lens.
Is there anything that can be done simply? to lower the mag and increase the field of view?
Jugo
May 24th, 2012 at 22:11
Jugo Ilic,
a. Cameras should not capture the whole field of view, otherwise the image appears in a black circle and many pixels are wasted. The magnification is therefore always higher, because the camera captures the central part of the field of view. This also eliminates the possibly blurry sides of the image in case you do not have plan objectives (not a big problem when viewing with the eye, but evident in photographs)
b. if your camera is without reduction lens and you use the objective of the lens to project the image directly on the chip, then there is indeed much extra magnification. A solution would be to somehow decrease the distance of the camera to objective.
c. if there is a reduction lens added but you are still not satisfied with the field of view, then you can can try to attach a different reduction lens. C-mount cameras usually allow the exchange: http://www.meijitechno.com/cmount.htm
Oliver.
May 25th, 2012 at 01:01
Thanks Oliver,
I was expecting the camera to capture the central field of view, and for that reason it should have a reduction so that the view is comparable to that seen with direct observation.
The camera (2.0MP USB Live Video Eyepiece Digital Camera) does not have a reducer as it images directly from the objective. I have tried to reduce the distance but it is difficult without significant modification of the tri-head.
I look at micro-sections of wood and usually work with relatively low power – 40-100x. I thought I could try a low power objective (1.2x), but it is not really suitable for use with the standard compound microscope. it has a long working distance just outside the range of the stage adjustment.
I’ll have a look at the link you suggested – sounds like a reduction lens might be the best option.
Regards,
Jugo
June 22nd, 2012 at 23:47
Thank you very much for the detailed info !
August 30th, 2012 at 13:24
An interesting page:
http://www.truetex.com/micad.htm
August 30th, 2012 at 13:34
Another useful pages:
http://www.spotimaging.com/iq/couplercalculations2.html
http://www.scienscope.com/support/showthread.php?t=84
September 5th, 2012 at 03:20
A little better than holding the mobile phone in your hand is to mount it with http://www.skylightscope.com/
January 7th, 2013 at 17:36
Do you have website or link to buy the connector for compact camera (afocal photography) to microscope and also for SLR camera? Could you give it to me? Thanks before
January 8th, 2013 at 23:20
Hello,
Try this one here for compact cameras: http://www.amazon.de/TS-Optics-Digiscoping-Digitalkameras-Digiklemme2/dp/B00716N3IC/ref=sr_1_8?ie=UTF8&qid=1357683114&sr=8-8
It should also work for microscopes, but have not used it myself.
For SLR: http://www.amazon.com/AmScope-Canon-Camera-Adapter-Microscopes/dp/B009OY7YG6/ref=pd_sbs_indust_7
For mobile phone cameras: http://www.skylightscope.com/
Best solution is probably to buy a dedicated microscope camera (USB): http://www.amazon.com/AmScope-Microscope-Digital-Software-Compatible/dp/B004WAGOKY/ref=pd_sim_sbs_indust_5
Oliver.